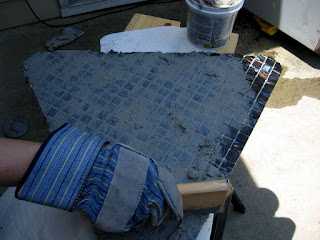
In our characteristic fashions, the Mr. wanted to just screw some plywood together, stain and seal it, and then call it a day. But the Mrs. had some more vibrant ideas, and after a quick trip to the local hardware store, we came back with some tile and mastic. Here's the story of the backyard table.
We cut out an (almost) equilateral triangle from one of the plywood scraps, rounded the corners, and sanded it to a nice finish. After this came two coats of stain and sealer.
Next we laid the tile out on the wood, marked the edges, and cut the tile with a Dremel equipped with a diamond cutting wheel (sorry no picture). This process took awhile, and should also be completed with proper safety precautions (safety goggles, dust-mask, and gloves).
 Next up was the mastic and grout - a thin layer of mastic was applied on the surface of the wood, and we pressed the tiles into that. Once it had dried (24 hrs) we applied the grout to the tiles. We needed to start at the center tiles and work our way to the edges to allow the edge tiles some time to set. This way we didn't knock all the grout off when cleaning the tile surfaces. Moistening the cloth helped remove the drier grout from the top of the edge tiles.
After that the legs were attached with some hardware that we had laying around from when we built the bench. The screws going into the table-top are 1/4 inch plywood screws. With the metal bracket, they barely avoid going through the plywood.
With a couple of coats of grout sealer, we had a final product! The table nestles nicely between the two chairs when we have them angled towards the fountain, and is matched in height to the arms, so it's easy to use.
Tools:
- Mitre saw
- Jig saw
- Power screwdriver ./ drill
- Dremel
- Protective devices (goggles, dust mask, gloves)
- $10 Tile
- $5 Mastic
- $0 Existing wood, screws.


No comments:
Post a Comment