Okay, so the Unison file sync is taking longer than I expected, but I realized that I could network the printer, so as to have any computer in the house print through the wireless. There were a few hiccups, but it was mostly painless. Here's what I had to do.
Part I - Installing Linux
Part II - Setting up SSH
Part III - Setting up SVN
Part IV - Networked Printing
First you'll want to install the samba print driver in Ubuntu, instead of using the command line to install this time, I went to the software center, searched for samba, and installed from there. I followed the steps from this Ubuntu community link, but had to make some modifications as I went. It was fairly fast, and I had to modify most every step, so here goes. First off all the setup is Ubuntu server with attached printer (HP Officejet 5500), two Windows 7 boxes, and a Win XP laptop that needed to print to the printer.
I went to http://localhost:631 from a browser on the Ubuntu box, but this didn't have much information on sharing the printer beyond allowing me to confirm the name. Next up was to open the samba configuration file "sudo vi /etc/samba/smb.conf". Under [printers] (there is something like #printers above it - don't be fooled, keep scrolling), change / add the lines to;
browsable = yes
guest ok = yes
use client driver = yes
The last one is for the XP machine. Now restart samba with;
sudo restart smbd
sudo restart nmbd
For the the Windows client printers, add the network printer by going to; Start -> Printers and Faxes -> Add a printer -> Network printer -> Now enter the local IP address of the machine and then the exact printer name for instance "\\192.168.1.21\officejet-5500-series". It will then give you a warning about installing drivers from the network, but then it will fail to install the driver. Select one close to you model (if you can find the exact model go for it).
At this point, the Windows 7 machines were printing fine. However the Windows XP box was not. I had to go back into printers and faxes, then right click on the Network Printer -> Properties -> Advanced. If you were not able to select the exact driver when you set up the printer (as I was) this may help. Previously I had already used the printer from the XP machine, and it had correctly installed the driver then. I was able to pull down the menu next to driver and find the correct one. After clicking Apply, Windows prompted me to install the driver again, but (again) they didn't have it, so I canceled out of that dialog, and hit OK to the printer's properties. With the correct driver associated, the printer was printing! As always questions and comments are welcome!
Home Server - Part III - SVN
Now that we have our linux box running, and we can connect to it from inside and outside the network, let's get to the good stuff - keeping all of our files in sync, and our version tracking the code. This allows us to always roll back if we should make a goof-up.
Part I - Installing Linux
Part II - Setting up SSH
Part III - Setting up SVN
Some reminders from the previous cases - our example server sits on internal network at 192.168.1.21, our DNS service forwards traffic from the example domain madscientistlair.blogspot.com, and our SSH is configured to use example port 1986. We've so far been able to use PuTTY to connect.
First off, we want to create a directory the non-administrator users can access (since we're using them when we SSH in). As the computer administrator we're going to create some directories, and then a usergroup, and finally add the users to that group, and give the group access to the folder. Then we can restrict SSH logins to those users, but they can still access all the files we want to access anyway.
I chose to make a new high level directory /share with the command "mkdir /share". Within that I have /share/music, /share/photos, and /share/repos. This last one is where our subversion repositories will sit. The repository is where subversion maintains all of the files and file history that it uses. We will actually add the repositories first, and then do our group permissions to make sure that the permissions take on the repository files.
I followed the quick start guide at the end of the svnbook to get myself started. First, we tell svn we want to use to repos folder as our repository;
The argument goes svn import [folder holding your files] [repository you want to add the files to]. The -m tells it what comment to associate with this version. It's always good to add comments to your commits so you can figure where to roll back to.
Now I promised user groups and access to that folder. Create the usergroup and add users with the commands;
Now we need to change permissions on the folder we created.
chgrp sharegrp -R /share
sudo chmod -R 775 /share
This sets the group associated with the share folder as sharegrp. The second command changes the folder permissions to read-write-execute for owner (root) and group (sharegrp) and read-execute for any other users. The -R flag tells it to recursively do this for all the folders and files in the folder. I still had some issues being able to read / write to the folder immediately after, but a simple log-out and log-in fixed this for me.
Now we've established and populated the subversion repository, we can check it out on our remote computers. I was following this guide, but the basic steps are to install TortoiseSVN. TortoiseSVN integrates into the windows shell, so that when you right click on or in a folder, you should see some new options "SVN Checkout" and "TortoiseSVN" with an arrow for more options. First we need to tell T.SVN that we'll be using ssh. So right click anywhere and go to TortoiseSVN -> Settings -> Network. Browse for the TortoisePlink SSH client. Mine was located at "C:\Program Files\TortoiseSVN\bin\TortoisePlink.exe". Now let's checkout the repository. Navigate where you want it, right click and hit "SVN Checkout". It will prompt us for the repository we wish to checkout. You want to end up with something like;
svn+ssh://[username]@[PuTTY Saved session name]/share/repos/ProjectA
Oh, I should mention; once PuTTY can connect to your server, re-enter the information, then give it a name on the main screen, and click save. This will save the session, and allow other programs, like plink or tortoiseplink (both command line interfaces to putty) to access this session. That's what I referred to above as the PuTTY saved session name. Also, it's useful to have Paegent running in the background during this, to run the authentication without prompting you for it. Click "Okay" and you should be on your way to checking out your repository!
I also had to configure svn for my linux work machine. The command line interface is a tad bit different. First off, since we're using a non-standard port, we have to add a new ssh tunnel for subversion. Edit ~/.subversion/config under the [tunnels] heading add in myssh = ssh -p 422
Now when you go to checkout tell svn to use that tunnel with the command;
Now onto using subversion. The basic work cycle goes something like this;
update -> resolve conflicts -> make changes -> commit changes
In TortoiseSVN click the folder you want to update and go "SVN Update". From the linux command line, either use svn update if you're in the folder, or svn update [path to folder] to update the specific repository. I've not yet had to resolve many conflicts, so I'm going to leave this blank for now. Once I have some more experience I'll link to a detailed discussion. When you're done commit the changes with svn commit -m "comment on the changes". Or use Tortoise, right click the folder and use SVN Commit. I have noticed that TortoiseSVN someitmes won't commit any changes, if you right click on the top level directory, and you have not checked out all the sub-directories.
On this note, you may only want to check out part of a repository, here's how to do it. For instance, assume our project repository looks like;
Again, when you're done making your changes, bring the server back up to date by right clicking and going SVN Commit.
That's it. This is pretty cursory guide to getting SVN running on our server, but you should have a functional, if rudimentary, SVN system now.
Part I - Installing Linux
Part II - Setting up SSH
Part III - Setting up SVN
Some reminders from the previous cases - our example server sits on internal network at 192.168.1.21, our DNS service forwards traffic from the example domain madscientistlair.blogspot.com, and our SSH is configured to use example port 1986. We've so far been able to use PuTTY to connect.
First off, we want to create a directory the non-administrator users can access (since we're using them when we SSH in). As the computer administrator we're going to create some directories, and then a usergroup, and finally add the users to that group, and give the group access to the folder. Then we can restrict SSH logins to those users, but they can still access all the files we want to access anyway.
I chose to make a new high level directory /share with the command "mkdir /share". Within that I have /share/music, /share/photos, and /share/repos. This last one is where our subversion repositories will sit. The repository is where subversion maintains all of the files and file history that it uses. We will actually add the repositories first, and then do our group permissions to make sure that the permissions take on the repository files.
I followed the quick start guide at the end of the svnbook to get myself started. First, we tell svn we want to use to repos folder as our repository;
svn create repos
Now we add filessvn import /tmp/myproject file:///var/svn/repos/ProjectA -m "initial import"
The argument goes svn import [folder holding your files] [repository you want to add the files to]. The -m tells it what comment to associate with this version. It's always good to add comments to your commits so you can figure where to roll back to.
Now I promised user groups and access to that folder. Create the usergroup and add users with the commands;
sudo addgroup sharegrp
sudo adduser username sharegrp
Obviously username needs to be changed to the actual user name you want to add.Now we need to change permissions on the folder we created.
chgrp sharegrp -R /share
sudo chmod -R 775 /share
This sets the group associated with the share folder as sharegrp. The second command changes the folder permissions to read-write-execute for owner (root) and group (sharegrp) and read-execute for any other users. The -R flag tells it to recursively do this for all the folders and files in the folder. I still had some issues being able to read / write to the folder immediately after, but a simple log-out and log-in fixed this for me.
Now we've established and populated the subversion repository, we can check it out on our remote computers. I was following this guide, but the basic steps are to install TortoiseSVN. TortoiseSVN integrates into the windows shell, so that when you right click on or in a folder, you should see some new options "SVN Checkout" and "TortoiseSVN" with an arrow for more options. First we need to tell T.SVN that we'll be using ssh. So right click anywhere and go to TortoiseSVN -> Settings -> Network. Browse for the TortoisePlink SSH client. Mine was located at "C:\Program Files\TortoiseSVN\bin\TortoisePlink.exe". Now let's checkout the repository. Navigate where you want it, right click and hit "SVN Checkout". It will prompt us for the repository we wish to checkout. You want to end up with something like;
svn+ssh://[username]@[PuTTY Saved session name]/share/repos/ProjectA
Oh, I should mention; once PuTTY can connect to your server, re-enter the information, then give it a name on the main screen, and click save. This will save the session, and allow other programs, like plink or tortoiseplink (both command line interfaces to putty) to access this session. That's what I referred to above as the PuTTY saved session name. Also, it's useful to have Paegent running in the background during this, to run the authentication without prompting you for it. Click "Okay" and you should be on your way to checking out your repository!
I also had to configure svn for my linux work machine. The command line interface is a tad bit different. First off, since we're using a non-standard port, we have to add a new ssh tunnel for subversion. Edit ~/.subversion/config under the [tunnels] heading add in myssh = ssh -p 422
Now when you go to checkout tell svn to use that tunnel with the command;
svn checkout svn+myssh://[username]@[madscientistlair.blogspot.com]/share/repos/ProjectA
Now onto using subversion. The basic work cycle goes something like this;
update -> resolve conflicts -> make changes -> commit changes
In TortoiseSVN click the folder you want to update and go "SVN Update". From the linux command line, either use svn update if you're in the folder, or svn update [path to folder] to update the specific repository. I've not yet had to resolve many conflicts, so I'm going to leave this blank for now. Once I have some more experience I'll link to a detailed discussion. When you're done commit the changes with svn commit -m "comment on the changes". Or use Tortoise, right click the folder and use SVN Commit. I have noticed that TortoiseSVN someitmes won't commit any changes, if you right click on the top level directory, and you have not checked out all the sub-directories.
On this note, you may only want to check out part of a repository, here's how to do it. For instance, assume our project repository looks like;
ProjectA
|-Web
|-Template
|-Android
`-Matlab
and you don't want the Web or Template folders checked out. When you initially check out the repository, select "Checkout Depth -> Immediate children including folders". This will make empty folders which you can then populate by right clicking and using SVN Update, but under options pull down "Fully Recursive" instead of "Working Copy".Again, when you're done making your changes, bring the server back up to date by right clicking and going SVN Commit.
That's it. This is pretty cursory guide to getting SVN running on our server, but you should have a functional, if rudimentary, SVN system now.
Home Server - Part II - SSH
Now that we've gotten our Ubuntu server box up and running, it's time to install the tools that will allow us to connect, known as secure shell, or SSH.
Part I - Installing Linux
Part II - Setting up SSH
First up is the install. Bring up a terminal, and use the command "sudo apt-get openssh-server" to install the SSH server. This is the command for Ubuntu, for Fedora, I think it's "yum openssh-server". You may also need to install the client. To check, first issue the command "man ssh" to bring up the manual page (use q to quit), if nothing comes up, then you don't have it installed, "sudo apt-get openssh-client" will do the trick.
That's all for the installation, now let's test out the SSH capabilities. Behind the scenes, after you did the install Ubuntu starts up the ssh service. Later we'll make changes to the ssh files and will need to restart the service, so this will become more clear.
My other computer is a Win XP box (good lord!), and I'm used to PuTTY to connect. We'll start on the local network. Grab the local ip off of the server with the terminal command "ifconfig". It returns a lot of other stuff, but somewhere in there should the be local ip address which looks like "192.168.#.##". Later I'll use the concrete example "192.168.1.21" as the host server. Load up a session of PuTTY and type in this address in the Host Name box, then click on Open. A command window opens that should be prompting you for your username and then password. You can use any of your accounts to test it out, after logging in it will drop you to the Ubuntu command line.
With that working, let's make it a little more secure. Why do we want to make this secure? Here's a great article by the Fedora folks on security precautions and why you want to use them. I particularly liked the examples of the number of attempts to log in as root.
The easiest things you should be able to do are 1) use a strong password on root, 2) change your port number to something non-standard, 3) use SSH 2, 4) deny root the ability to log in, and 5) use key authentication. I would recommend you implement all of Fedora's guidelines (if applicable), but I'll cover these four in more depth.
Assuming you can take care of #1 on your own, here's how to handle number's 2-4. On the linux box, use the command "sudo vi etc/ssh/sshd_config". This opens up a text editor (called vi, see here for a list of commands) and shows the preferences file for the ssh server. Find and edit the text lines;
Now we'll set up key authentication, replacing the user-id and password scheme. This makes you system less vulnerable to brute force attempts. Instead of trying a common name "root" and a bunch of passwords "", "password", etc. SSH will confirm you identity with a public/private key pair. This is actually how SSH transmits all it's data anyway, so your login will be as secure as the channel (or your computer). What happens in this scheme, is that you generate two "keys" one is called the private key - only you have the private key, and it identifies exactly who you are. The second is the public key, which you can give out to anyone! If you want someone to know that it is you at the other end, you encrypt a message (say "Hello world") with your private key. You send it to them, and they decrypt it with the public key you gave them, they see "Hello world" and know it's you. Why? Because if someone else had encrypted the message with her private key, gibberish would result on the output. Moreover, knowledge of the public key doesn't let someone know what your private key is. So as long as your private key is private, you can encrypt messages with it, and if they're decipherable, then the other party knows it is you at the other end. Of course there are drawbacks to this method - you could compute every possible private/public key pair, and then if someone knows your public key, they also have your private key. But if you make the keys longer, then it becomes much more difficult to compute every pair, and the system remains secure.
I found this link extremely helpful in setting up key authentication using PuTTY and won't try to reproduce his work here; http://www.howtoforge.com/ssh_key_based_logins_putty_p2. Also be sure to encrypt (password protect) your private key, as if anyone gets their hands on your private key file they could impersonate you. Password protecting it gives you another layer of defense. For linux, you can use the command "ssh-keygen -t rsa" to generate the key pairs. Same steps apply for registering your public key with the server.
Once you have key based logins on all of your computers, we can turn off username / password login. Open your config file again; "sudo vi etc/ssh/sshd_config", and change the following lines;
So all this allows us to ssh into our server while on the same network, but what if we want to get to our files while on a different network, a friend's house or at work? Nowadays most IP addresses dynamically assigned and recycled, so we'll use Dynamic DNS (domain name system) to create a easy to remember web address for our server. I chose to use the FreeDNS service, although others exist, like OpenDNS and DynDNS is another popular one. For example, you sign up for a sub-domain, the "madscientistlair" part of "madscientistlair.blogspot.com". Then you use as the host name field in PuTTY, "madscientistlair.blogspot.com" and the DNS service says "Oh, you really want; 245.324.3.564", which is the current IP address your ISP has given your home. PuTTY connects to this instead, which goes to your router, which knows that requests for port 1986 should be sent to "192.168.1.21" and you connection to your server is made.
The second part is installing a client to keep the Dynamic DNS servers updated. On my Ubuntu box, I used ddclient, installing with "sudo apt-get install ddclient". On setup, it prompts you for the service you're using. For more information check out the Ubuntu community page. Your router may support one of these services, go to your router web administration tools and then there's usually a Dynamic DNS tab.
One other important step, and you may have noticed this above. How does the router know that you want to talk to the server computer? First it's useful to set a static IP for the server, this way the address "192.168.1.21" that we've been connecting to from home doesn't change in the middle of the night and we can no longer get to our server. The second is to set up port forwarding. There are usually tabs for both in the web administration tools for your router. Since these vary wildly, I can't give you any more advice other than on the port forwarding page, you want to have 1986 (or whatever SSH port number you specified in the sshd_config file) point to your server; 192.168.1.21. To check that it's working, go to http://canyouseeme.org/ and give it your port number. Below their ad, you'll see the result.
There was one file issue I ran into. I could use "madscientistlair.blogspot.com" to talk to my server when I was outside of the house, but not when I was in the house! It turns out that some classes of routers don't allow you to do this. Essentially they prevent you from talking to a local machine through an outside connection. Kinda like using your cellphone to call you grandma in Florida so she can call the home phone. To get around this you'll have to have a batch script on your desktop that edits your windows "hosts" file when you switch locations. For example, you could have two scripts "set_when_home.bat" and "set_when_away.bat". You run set_when_home, when you're home, and this tells windows that when PuTTY asks to connect to "madscientistlair.blogspot.com" it really wants to connect to "192.168.3.564". When you're away, you run set_when_away, and it undoes this change. See here for a couple of example hosts files.
Well that's it. We've installed SSH into our server, secured it, and allowed access from the outside. If you have any lingering questions, or can't get something to work, leave a comment and I'll try to help.
Part I - Installing Linux
Part II - Setting up SSH
First up is the install. Bring up a terminal, and use the command "sudo apt-get openssh-server" to install the SSH server. This is the command for Ubuntu, for Fedora, I think it's "yum openssh-server". You may also need to install the client. To check, first issue the command "man ssh" to bring up the manual page (use q to quit), if nothing comes up, then you don't have it installed, "sudo apt-get openssh-client" will do the trick.
That's all for the installation, now let's test out the SSH capabilities. Behind the scenes, after you did the install Ubuntu starts up the ssh service. Later we'll make changes to the ssh files and will need to restart the service, so this will become more clear.
My other computer is a Win XP box (good lord!), and I'm used to PuTTY to connect. We'll start on the local network. Grab the local ip off of the server with the terminal command "ifconfig". It returns a lot of other stuff, but somewhere in there should the be local ip address which looks like "192.168.#.##". Later I'll use the concrete example "192.168.1.21" as the host server. Load up a session of PuTTY and type in this address in the Host Name box, then click on Open. A command window opens that should be prompting you for your username and then password. You can use any of your accounts to test it out, after logging in it will drop you to the Ubuntu command line.
With that working, let's make it a little more secure. Why do we want to make this secure? Here's a great article by the Fedora folks on security precautions and why you want to use them. I particularly liked the examples of the number of attempts to log in as root.
The easiest things you should be able to do are 1) use a strong password on root, 2) change your port number to something non-standard, 3) use SSH 2, 4) deny root the ability to log in, and 5) use key authentication. I would recommend you implement all of Fedora's guidelines (if applicable), but I'll cover these four in more depth.
Assuming you can take care of #1 on your own, here's how to handle number's 2-4. On the linux box, use the command "sudo vi etc/ssh/sshd_config". This opens up a text editor (called vi, see here for a list of commands) and shows the preferences file for the ssh server. Find and edit the text lines;
Port 22 -> Port NNNNThe right side of the arrow is what it should read when you're done. For port numbers, the most common are; 22 (SSH) 2222 (alternative SSH), 80 (webserver) 8080 (alternative webserver). So we'll pick an unused port say 1986. You can check it against this list, but it's not required that you pick something not on there, the max you can choose is 65535 (I think). Now if you try to use PuTTY to log-in again, you can't. We have to specify the port as well, the field directly right of the Host Name. With this you should be back to logging in just fine.Protocol 2,1 -> Protocol 2PermitRootLogin yes -> PermitRootLogin no
Now we'll set up key authentication, replacing the user-id and password scheme. This makes you system less vulnerable to brute force attempts. Instead of trying a common name "root" and a bunch of passwords "", "password", etc. SSH will confirm you identity with a public/private key pair. This is actually how SSH transmits all it's data anyway, so your login will be as secure as the channel (or your computer). What happens in this scheme, is that you generate two "keys" one is called the private key - only you have the private key, and it identifies exactly who you are. The second is the public key, which you can give out to anyone! If you want someone to know that it is you at the other end, you encrypt a message (say "Hello world") with your private key. You send it to them, and they decrypt it with the public key you gave them, they see "Hello world" and know it's you. Why? Because if someone else had encrypted the message with her private key, gibberish would result on the output. Moreover, knowledge of the public key doesn't let someone know what your private key is. So as long as your private key is private, you can encrypt messages with it, and if they're decipherable, then the other party knows it is you at the other end. Of course there are drawbacks to this method - you could compute every possible private/public key pair, and then if someone knows your public key, they also have your private key. But if you make the keys longer, then it becomes much more difficult to compute every pair, and the system remains secure.
I found this link extremely helpful in setting up key authentication using PuTTY and won't try to reproduce his work here; http://www.howtoforge.com/ssh_key_based_logins_putty_p2. Also be sure to encrypt (password protect) your private key, as if anyone gets their hands on your private key file they could impersonate you. Password protecting it gives you another layer of defense. For linux, you can use the command "ssh-keygen -t rsa" to generate the key pairs. Same steps apply for registering your public key with the server.
Once you have key based logins on all of your computers, we can turn off username / password login. Open your config file again; "sudo vi etc/ssh/sshd_config", and change the following lines;
   ChallengeResponseAuthentication no
   PasswordAuthentication no

UsePAM no
So all this allows us to ssh into our server while on the same network, but what if we want to get to our files while on a different network, a friend's house or at work? Nowadays most IP addresses dynamically assigned and recycled, so we'll use Dynamic DNS (domain name system) to create a easy to remember web address for our server. I chose to use the FreeDNS service, although others exist, like OpenDNS and DynDNS is another popular one. For example, you sign up for a sub-domain, the "madscientistlair" part of "madscientistlair.blogspot.com". Then you use as the host name field in PuTTY, "madscientistlair.blogspot.com" and the DNS service says "Oh, you really want; 245.324.3.564", which is the current IP address your ISP has given your home. PuTTY connects to this instead, which goes to your router, which knows that requests for port 1986 should be sent to "192.168.1.21" and you connection to your server is made.
The second part is installing a client to keep the Dynamic DNS servers updated. On my Ubuntu box, I used ddclient, installing with "sudo apt-get install ddclient". On setup, it prompts you for the service you're using. For more information check out the Ubuntu community page. Your router may support one of these services, go to your router web administration tools and then there's usually a Dynamic DNS tab.
One other important step, and you may have noticed this above. How does the router know that you want to talk to the server computer? First it's useful to set a static IP for the server, this way the address "192.168.1.21" that we've been connecting to from home doesn't change in the middle of the night and we can no longer get to our server. The second is to set up port forwarding. There are usually tabs for both in the web administration tools for your router. Since these vary wildly, I can't give you any more advice other than on the port forwarding page, you want to have 1986 (or whatever SSH port number you specified in the sshd_config file) point to your server; 192.168.1.21. To check that it's working, go to http://canyouseeme.org/ and give it your port number. Below their ad, you'll see the result.
There was one file issue I ran into. I could use "madscientistlair.blogspot.com" to talk to my server when I was outside of the house, but not when I was in the house! It turns out that some classes of routers don't allow you to do this. Essentially they prevent you from talking to a local machine through an outside connection. Kinda like using your cellphone to call you grandma in Florida so she can call the home phone. To get around this you'll have to have a batch script on your desktop that edits your windows "hosts" file when you switch locations. For example, you could have two scripts "set_when_home.bat" and "set_when_away.bat". You run set_when_home, when you're home, and this tells windows that when PuTTY asks to connect to "madscientistlair.blogspot.com" it really wants to connect to "192.168.3.564". When you're away, you run set_when_away, and it undoes this change. See here for a couple of example hosts files.
Well that's it. We've installed SSH into our server, secured it, and allowed access from the outside. If you have any lingering questions, or can't get something to work, leave a comment and I'll try to help.
Home Server - Part I - Linux Server Box
My goal in this was to start a personal fileserver over SSH using Unison (for static binary files - pictures, music, etc), and subversion (for revisioned text files; i.e. code, docx documents, etc). I was thinking about using git, and still might for personal use, but we have subversion installed in the work computers, and part of this was syncing my home files with the work files, so I stuck with subversion.
Part I - Installing Linux
Part II - Setting up SSH
The easiest step I figured was getting Ubuntu on the laptop that I was going to have act as the server. HA! As if this project was going to be easy. Okay, so I started with Fedora 16 live, after that dropped me to the debug shell, I looked up some of the error messages I was getting, and there seemed to be no unified solution. Some suggested it was the bios (which I only wanted to update as a last resort), missing drivers, etc. I figured the easiest thing would be to switch distros and see if that help. One Ubuntu burn later... one linux mint burn later... one ubuntu server burn later... Okay, but now we're getting somewhere, since Ubuntu server doesn't have to launch into the live environment before giving me options (my Linux help buddy mentioned holding / tapping left shift to get the live CD's to display menus, but these processes lost out to my patience). So how did these options help us figure out what was wrong?
Well at this point we figured it's likely to be the CD. Earlier we thought it might be graphics; Fedora was a bleeding edge distro, Ubuntu more conservative, Mint was a graphically more conservative yet, and Ubuntu Server is the most graphically paired down of them all. But since none of the CD's installed, including the server CD, which failed it's self error check (see step 3 below).
Step 1 was to check the MD5 hash of the ISO (which you always should do before burning - and I did), I was burning in linux, so the command; "md5sum imagename.iso > file.txt" does the md5 checksum and sends the output to a text file, where you can paste in the offical hash on another line and quickly see if they compare. In Windows you can get the hash with an fciv tool provided by Microsoft.
Step 2 is to compare the ISO against the burned CD. You can't really directly compare but the command;
"dd if=/dev/cdrom1 | head -c `stat --format=%s ubuntu-11.10-server-i386.iso` | md5sum" checks the size of the ISO and sees how many blocks this should take on the CD and if it fact does take up this space. You'll have to change the location of the CD drive and the file you're burning in the command. I don't know the equivalent command on Windows for this.
Step 3 was the smoking gun. From within the server boot, there was an option to "Check integrity of install media" which failed every time we ran it, and not reliably in one spot either, sometimes right at the start, sometimes on other files. This was when I got really lucky - I was trying to install at work, and we had an external USB CD-RW drive lying around. Not only that, but the laptop's BIOS recognized it as a CD drive and put it in the boot order. So we got that to boot! Finally 8+ hours in, and a working install of Ubuntu.
With Ubuntu working (is it just me, or is Unity trying to be OS X?), the first thing to do is to update. At this point it's also good to have a couple of other users who don't have administrator privliges. You can go into the "system settings -> users -> unlock -> +" to add more users from unity. Be sure to give reasonably strong passwords. We'll use these users as our primary remote log-in users. A few other words of advice; make sure that the root user has a strong password! And I only recommend this for home use - write it down somewhere safe - you won't be using it all that often after the initial setup and you don't want to loose this password. We'll be sure to deny remote user log-ins as root when we set up ssh, which is the next step.
Weekend Project - Hat Rack
Here's another quick weekend project we undertook. After having our hats laying around on chairs and coffee tables, I finally decided that it was time to give them a dedicated place. So we brainstormed some ideas, and thought it would be a neat idea to have a "his and hers" hat rack, or even better, a "Mr. and Mrs." hat rack.
We picked up a pine sign plaque from a hobby store, and then some hooks from the local hardware store. After some quick staining, sealing, and screwing in the hardware (I opted for slightly smaller than the stock screws so they wouldn't go through the other side), the sign was ready for some customization.
In an attempt to make nice clean text, I set down a layer of tape and
then a print out of a nice font with above it. Tracing over the font
with moderate pressure using an exact o-knife cut through the paper and
the tape. As a tip, i would recommend not layering the tape on itself,
this gave me some trouble later.
After tracing with the knife and removing the stencil and tape, it was ready for a layer of paint. This is just a craft-acrylic paint laid down over the tape stencil.
When removing the tape, I found it very useful to trace around the stencil with the exact o-knife again. This separated the paint on the wood from the paint on the tape. Hence, the tape was much less likely to peel up any paint with it (the 's' above suffered while I figured this out - but I'll just say it's an antique look).
Here's the final product with all the tape removed and looking snazzy up on the wall. A couple of 1/4 inch drill holes in the back provide a recess for the nails. Just be careful not to go all the way through the board.
This was a pretty quick, cheap, and unique project that really adds some nice personality to the entrance by the door. Now for the usual breakdown:
Tools:
We picked up a pine sign plaque from a hobby store, and then some hooks from the local hardware store. After some quick staining, sealing, and screwing in the hardware (I opted for slightly smaller than the stock screws so they wouldn't go through the other side), the sign was ready for some customization.
 |
| Cutting out the stencil |
 |
| Trace the stencil with the knife again for easy removal |
After tracing with the knife and removing the stencil and tape, it was ready for a layer of paint. This is just a craft-acrylic paint laid down over the tape stencil.
 |
| Careful scraping can remove the stray paint. |
When removing the tape, I found it very useful to trace around the stencil with the exact o-knife again. This separated the paint on the wood from the paint on the tape. Hence, the tape was much less likely to peel up any paint with it (the 's' above suffered while I figured this out - but I'll just say it's an antique look).
 |
| The finished product! |
 |
| It's practical too! |
This was a pretty quick, cheap, and unique project that really adds some nice personality to the entrance by the door. Now for the usual breakdown:
Tools:
- Sandpaper, stain, sealant, acrylic paint.
- Screwdriver / drill
- Tools: Used our existing stock.
- Supplies: $8 (sign) $10 (hardware)
- Total: $18
Rooted Nook - Borrowing e-books
I'm always looking for another trick to teach my rooted Nook Color e-reader, so when I found out I could 'borrow' library books to read, I just had to give it a try. I'll be using my local library, the Durham County Library, which uses OverDrive and Adobe Digital Editions to provide it's e-book lending. Your library may also use OverDrive (they seem to be pretty popular), and if they do this guide should work for you as well. If not, the best resource for you to go to would be the library itself, take your e-reader and they likely have someone on staff who can teach you how to set it up.
I found our library has a great online reference that you may want to have a look at; the DCL's e-book basics guide. This guide is an in-depth look at that guide with some hiccups I encountered along the way. You should already be set up with a physical library card and a PIN that you set when you made the card (four digits - try the last 4 from your phone number if you don't remember).
You can do this one of two ways, first I'll cover using Adobe to transfer the file to the Nook and then using the Nook reader app to view it. You should be able to use this method with any version of the Nook - either the original, touch, Color, Tablet, or rooted Color, like me. You'll need Adobe Digital Editions (download from the link above) and an account with Adobe. Here's where I ran into my first problem - I had to go through the process of making an account three times until it finally sent out the confirmation e-mail to my account. If you'd like to see a larger version of one of the images below, just click on them.
 From the library eBook page click on the OverDrive link and start browsing for books. I'll be downloading Fool Moon (#2 of the Dresden files).
 You can select either 7 or 14 days as a checkout period (top highlight - didn't see that the first time through), and then proceed to checkout. At checkout you'll need your library number (on the back of the card or key-ring dongle), and your PIN.
 Once you've checked out, you can "download the book" to your computer. Here's another catch - you don't actually download the book, you download a file that Adobe Digital Editions reads and uses to download the book from their server. Make sure you know where the file downloads too (check the \My Documents\Downloads\ folder).
 To get the book to appear in Adobe, just drag that file you downloaded onto the Adobe Digital Editions icon, it will download the book and you can now view it on your computer. But wait! You say, I wanted to view it on my Nook. Well I do to, so hold on.
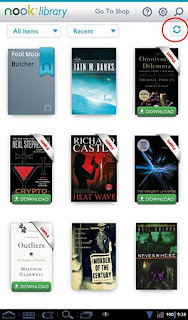
 Grab your nook and use the USB cable to plug it in, then turn on file transfer. If you're like me and are rooted using CM 7 (grab the latest stable or more recent nightly - I'm running n253 at the time of this writing) pull up the status bar (1) and enable file transfer (2). I'm not sure how it looks if you're running the stock OS.

 Adobe Digital Editions should now recognize the device and suggest that you authorize it. It will notice both the "MyNOOKcolor" (which is the emmc or internal memory) and your SD card (mine is called NOOKSD, creative, I know ). You want to authorize the drive where you installed the Nook app (you can authorize both if you want to), then drag and drop the title to that drive.
Turn off file sharing on the Nook and disconnect it, then launch the Nook app. Once you hit refresh in the corner, you should see the library e-book appear. You're all done, enjoy the read!
When you're done, launch Adobe Digital editions again, and from the library view (where you see the pictures of the covers), click the arrow in the upper left corner, this will bring up an options menu for the book. This will have the opportunity to return the book early if you wish. Otherwise, it will expire after the lending period is over and remove itself from you library.
What do you do if you don't have a computer or USB access? There's still a way to get the book onto your nook, we'll go through OverDrive directly. First grab the OverDrive app from the market (I'm not seeing it in the B&N market, as of this writing keep trying perhaps they'll have it in the future). The above directions should still work for stock users though.
 Once you're in Overdrive (leftmost image) click menu, and then "Get Books". This will bring you to the add a library page if you haven't been here before, go ahead and click the add library, and enter the zip code on the next screen.
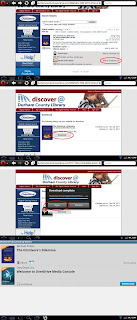 Once you have a library associated, clicking on it, will bring up the web browser and direct you over to the e-book search for your library (I'm using Opera mobile, yours may look different)
Here I've searched for "The Omnivore's Dilemma", select Adobe ePub book and follow the same sequence of download it as you did before; choose the checkout period and enter your library number (on the back of your card, or key dongle), and your PIN. You'll download a file, but again, this isn't the eBook itself. Choose to open the file with OverDrive (if you're even given an option) and OverDrive will begin to download the eBook. When it's done it will appear in your OverDrive library and you can read away!
The OverDrive reader looks pretty simple, but it has most of the features you're used to from the Nook reader. Simply tap on the menu key to bring up the main menu of options (font size, style, brightness, etc.). I was unable to find a way to get the Nook app to display the book. If you are able to please drop me a line in the comments, I would like to hear it.
 When you're done with the book, long-press it in the OverDrive app and then select delete. This will bring up a menu of options, from which you can return the book early. One nice thing is that you can see exactly how many days you have remaining from the main library screen, after which the book will be removed from the library.
That's all there is to it, I hope you make use of your local library's eBook lending options. I know I'm really enjoying being able to check out a book any time of day without having to drive to the library!
Epilogue; Those of you who know me, are probably quite aware of my enthusiasm for my rooted Nook Color. Are you surprised I haven't posted the rooting process here? Yeah, so am I. I may post my collected tricks at some point, but I would really recommend visiting the xda-developers forums - there is usually a post there to guide you through whatever trouble there is, and there are plenty on rooting and your options for doing it.
I found our library has a great online reference that you may want to have a look at; the DCL's e-book basics guide. This guide is an in-depth look at that guide with some hiccups I encountered along the way. You should already be set up with a physical library card and a PIN that you set when you made the card (four digits - try the last 4 from your phone number if you don't remember).
You can do this one of two ways, first I'll cover using Adobe to transfer the file to the Nook and then using the Nook reader app to view it. You should be able to use this method with any version of the Nook - either the original, touch, Color, Tablet, or rooted Color, like me. You'll need Adobe Digital Editions (download from the link above) and an account with Adobe. Here's where I ran into my first problem - I had to go through the process of making an account three times until it finally sent out the confirmation e-mail to my account. If you'd like to see a larger version of one of the images below, just click on them.


 Adobe Digital Editions should now recognize the device and suggest that you authorize it. It will notice both the "MyNOOKcolor" (which is the emmc or internal memory) and your SD card (mine is called NOOKSD, creative, I know ). You want to authorize the drive where you installed the Nook app (you can authorize both if you want to), then drag and drop the title to that drive.
Turn off file sharing on the Nook and disconnect it, then launch the Nook app. Once you hit refresh in the corner, you should see the library e-book appear. You're all done, enjoy the read!
When you're done, launch Adobe Digital editions again, and from the library view (where you see the pictures of the covers), click the arrow in the upper left corner, this will bring up an options menu for the book. This will have the opportunity to return the book early if you wish. Otherwise, it will expire after the lending period is over and remove itself from you library.
What do you do if you don't have a computer or USB access? There's still a way to get the book onto your nook, we'll go through OverDrive directly. First grab the OverDrive app from the market (I'm not seeing it in the B&N market, as of this writing keep trying perhaps they'll have it in the future). The above directions should still work for stock users though.

 Once you have a library associated, clicking on it, will bring up the web browser and direct you over to the e-book search for your library (I'm using Opera mobile, yours may look different)
Here I've searched for "The Omnivore's Dilemma", select Adobe ePub book and follow the same sequence of download it as you did before; choose the checkout period and enter your library number (on the back of your card, or key dongle), and your PIN. You'll download a file, but again, this isn't the eBook itself. Choose to open the file with OverDrive (if you're even given an option) and OverDrive will begin to download the eBook. When it's done it will appear in your OverDrive library and you can read away!
The OverDrive reader looks pretty simple, but it has most of the features you're used to from the Nook reader. Simply tap on the menu key to bring up the main menu of options (font size, style, brightness, etc.). I was unable to find a way to get the Nook app to display the book. If you are able to please drop me a line in the comments, I would like to hear it.

That's all there is to it, I hope you make use of your local library's eBook lending options. I know I'm really enjoying being able to check out a book any time of day without having to drive to the library!
Epilogue; Those of you who know me, are probably quite aware of my enthusiasm for my rooted Nook Color. Are you surprised I haven't posted the rooting process here? Yeah, so am I. I may post my collected tricks at some point, but I would really recommend visiting the xda-developers forums - there is usually a post there to guide you through whatever trouble there is, and there are plenty on rooting and your options for doing it.
Bedside Tables - Part III
Finally decided to get a sander - and boy am I glad I did! We really could have used it for all of our previous projects. After reading up a bit on sanders we opted for getting a 5-inch random orbital sander with the hook and loop sanding pads. [Aside; it never clicked with me that "hook-and-loop" equates to "Velcro", I was worried that I'd be wrestling with the sander threading some crazy loop mechanism through sanding pads!]
The sander definitely makes sanding easier - I was able to finish off one of the sanding passes in one evening, whereas one pass would take me two evenings before (and I made two passes before this, just if you were wondering what was taking these posts so long). Unfortunately, we noticed that my hand-sanding from before had inadvertently made some light-scratches on the surface. The random-orbital sander, because of the 'randomness' in the vibration does a good job of avoid this. You can go either with or against the grain with the random orbital sander, and as long as you don't push down very hard, or angle so the edges of the sander bite into the wood, you shouldn't leave any scratches and you should have a nice smooth sanded surface at the end.
Post Sanding, we stained the wood, placing two coats of our favored "dark cherry" stain that we've used on all our other projects, on all the sides and edges. We finished up with a quick coat of spray polyurethane sealant, although we'll likely go over the finished product with a paint-on polyurethane sealant.
With everything sanded and sealed, it was time for partial assembly (we still have to cut, sand, and stain the sides and doors). You can see from the photo, that I opted for thin, 2 screw corner brackets, which I first put on the shelves and the top of the legs. I'm a big fan of pilot holes, and there are some on the legs and top waiting for the screws.
A very small dab of glue accompanied the legs as they were screwed into the top. Once all were in, I inched the shelves between the four legs and screwed them into place. For each shelf, the brackets were first screwed to the shelf. Then I partially screwed in the screws connecting them to the legs, only tightening them down fully once all were in.
The sander definitely makes sanding easier - I was able to finish off one of the sanding passes in one evening, whereas one pass would take me two evenings before (and I made two passes before this, just if you were wondering what was taking these posts so long). Unfortunately, we noticed that my hand-sanding from before had inadvertently made some light-scratches on the surface. The random-orbital sander, because of the 'randomness' in the vibration does a good job of avoid this. You can go either with or against the grain with the random orbital sander, and as long as you don't push down very hard, or angle so the edges of the sander bite into the wood, you shouldn't leave any scratches and you should have a nice smooth sanded surface at the end.
 |
| Brackets attached to the parts, waiting to be put together. |
 |
| A close-up of the finished product. |
With everything sanded and sealed, it was time for partial assembly (we still have to cut, sand, and stain the sides and doors). You can see from the photo, that I opted for thin, 2 screw corner brackets, which I first put on the shelves and the top of the legs. I'm a big fan of pilot holes, and there are some on the legs and top waiting for the screws.
A very small dab of glue accompanied the legs as they were screwed into the top. Once all were in, I inched the shelves between the four legs and screwed them into place. For each shelf, the brackets were first screwed to the shelf. Then I partially screwed in the screws connecting them to the legs, only tightening them down fully once all were in.
 |
| The two tables partly assembled! |
Volia! They're assembled and starting to look light nightstands. Now we just need to finish off the sides, which should prove an interesting exercise with the jigsaw - I've yet to perform an cut with the jigsaw blade at an angle. The final steps will be deciding on the door mechanisms and the hardware. Still, it's nice having a picture of what they'll look like when finished. And they seem to be a good height next to the bed (couldn't help taking them up there for a trial).
Subscribe to:
Comments (Atom)